Designing and configuring a ‘SuperLab’, which enables multiple classes of different sizes to be held simultaneously, posed a number of system design challenges – including class configuration, video distribution and two-way audio communication.
A SuperLab is a new category of teaching room. The first SuperLab was built at London Metropolitan University; it quickly gained a reputation as a key tool for improving grades and enhancing retention rates among first-year science students.
The design of a SuperLab aims to facilitate the ‘buzz’ of a multidisciplinary environment while ensuring students feel part of an intimate class group. Many classes can be run at once, and the space must be instantly reconfigurable to allow an instructor to address any size of class – from as few as a dozen to as many as 200 students.
The University of Technology Sydney (UTS) wanted a SuperLab as the centrepiece of its new Science and Graduate School of Health Building. Ranked as the number one young university in Australia, UTS is one of the largest universities in the country, with a total enrolment of over 40,000 students and 3,000 staff.
Facilitating two-way communication between a demonstrator and a class undertaking practical chemistry or biology experiments is not straightforward. Two further requirements – for different groups to work side by side without interrupting each other, and the ability to configure up to 12 different-sized classes on the fly – posed further system design difficulties.
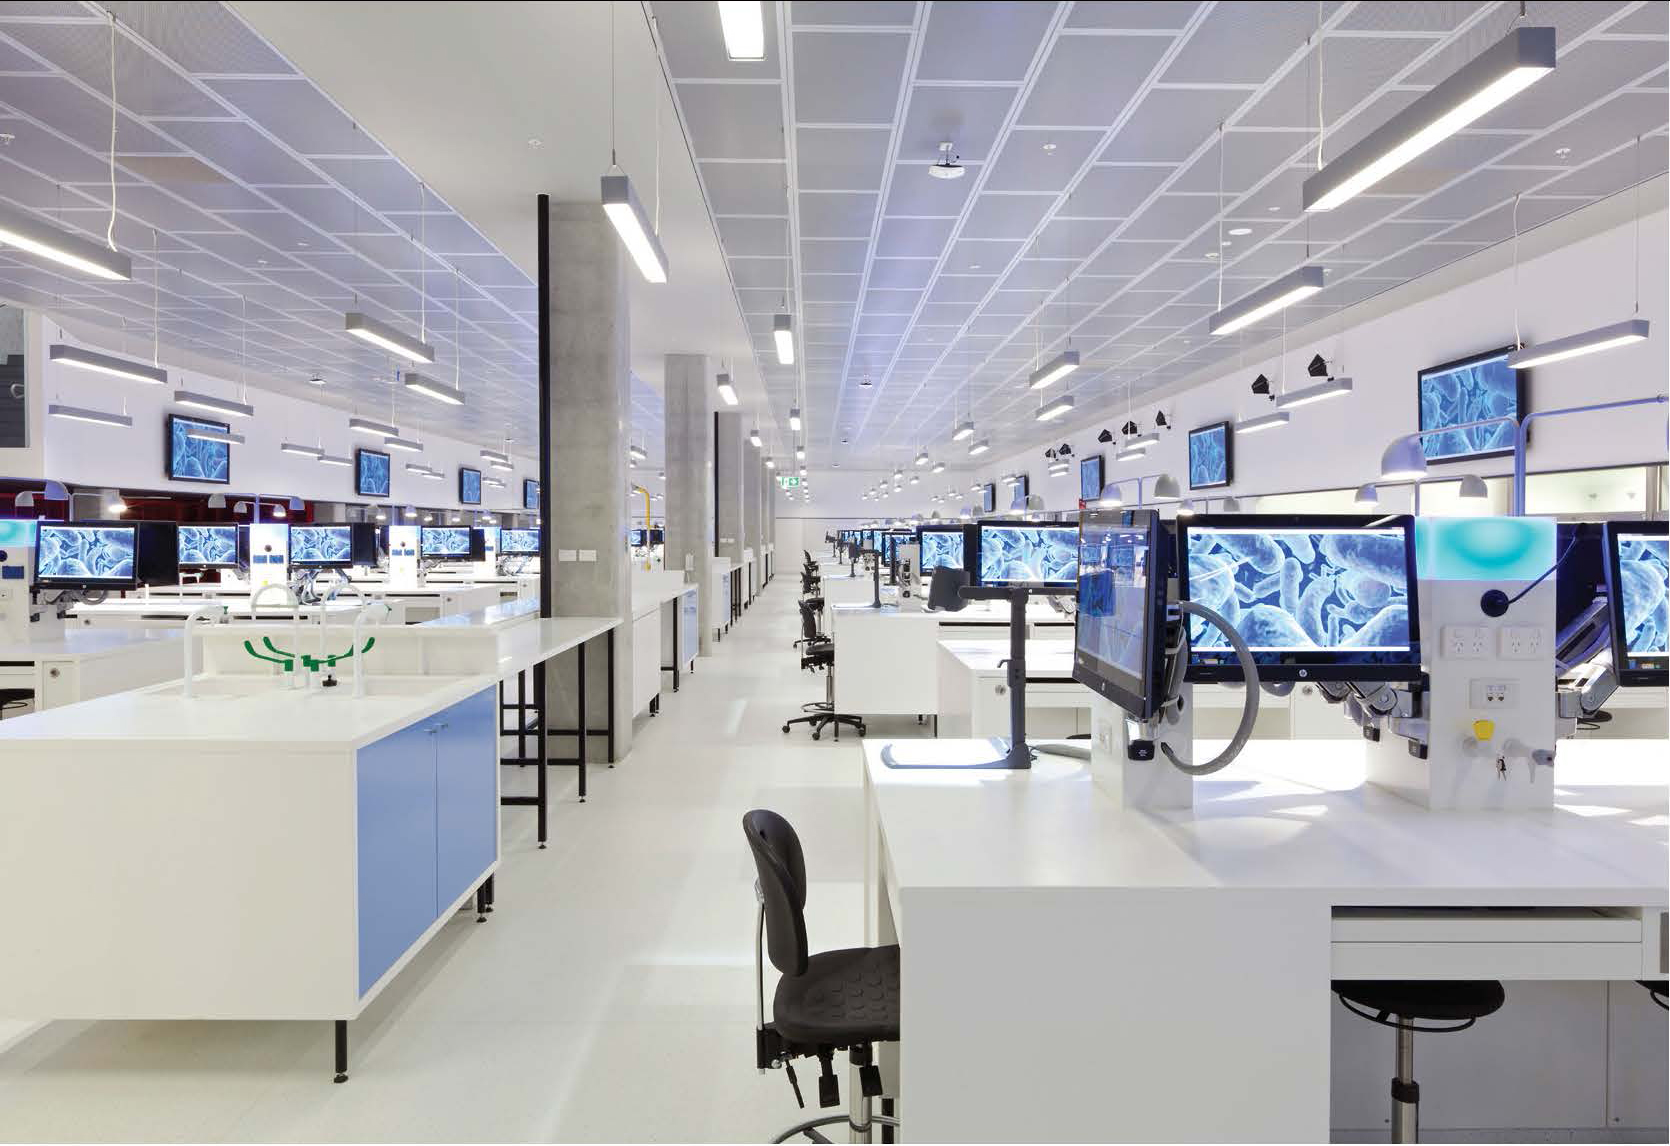
“My introduction was via Faculty of Science staff here at UTS who’d previously visited the London Superlab,” explains Rob Hardy, senior project manager at UTS’ Audio Visual Services department. UTS’s vision was for a state-of-the-art SuperLab 52m long, with space for 220 students. The 26 workbenches seating eight students were to be fitted with touchscreen PCs and microphones, to allow up to 12 classes to work concurrently. Every other bench would feature a demonstration station for teachers, while multiple break-out areas would accommodate group work and informal meetings.
Video switching
From the experience in London, it was clear that this SuperLab would require bringing together complex video matrix switching, two-way multifrequency wireless communication and IP video links direct to each student computer. From the earliest stage, UTS designers knew they wanted to use a Crestron control solution. “We’re a Crestron house,” notes Hardy. “Obviously there are other switching and control suppliers available, but we have a good and proven solution with DigitalMedia and Crestron control”. UTS is a heavy user of Crestron control and switching solutions and employs Crestron Fusion RV (Room View) to manage the myriad AV systems throughout the dozens of buildings in its downtown campus.
Hardy knew that the next problem would be routing and transporting the many vision sources involved with multiple simultaneous classes. So early in the design phase he briefed Bignesh ‘Vicky’ Dayal, the University’s long-term contact at Crestron, about the project and sought input on the technical challenges involved in video distribution.
Dayal recalls: “We looked at their specifications and started to work on a design using Crestron DigitalMedia (DM). Within Crestron we have a Tech Sales design team, who do ‘proof-of-concept’ designs and then build a prototype to show how it will work.”
The proof-of-concept idea would prove crucial. UTS set up a dedicated space to build a student bench and two teaching stations, with Crestron coming on board to provide prototype systems for testing. The brief called for 12 demonstrator stations, each with a PC, a document camera, a wireless input for a tablet PC and wired inputs for laptops, microscopes and other experimental equipment. Video sources could be switched to selected wall-mounted monitors between each pair of benches and were also to be delivered direct to a PC at each student position. Demonstrators would each have a wireless headset to allow them to have two-way conversations with students in their class group.
Crestron all-in-one presentation switchers soon emerged as the most suitable core for each of the 12 teaching stations. The system would provide local control, as well as video source switching and audio de-embedding and mixing. Output signals would then be routed to the central equipment rack via DigitalMedia across a single Cat6A cable.
At the rack a Crestron DM-MD32x32 DigitalMedia switcher provided outputs to the monitors, as well as handling the combining tasks feeding signals back to the benches. So one problem was solved, but there were still three to go.
Two-way audio
Now, as Hardy recalls, things got tougher. “The surprising thing was the audio,” he says. “We anticipated that the switching to make the space adaptable for different size classes was always going to be a problem. But it became apparent very quickly that to find a two-way audio solution for 220 students in up to 12 groups was going to either be really, really costly – or very hard. We tried various different manufacturers, and different industries as well, just to find out if there was anything out there that would help us with the two-way communication. We even looked at smartphones — but that wasn’t very practical.”
Finding enough spectrum space was difficult, so UTS finally settled on a hybrid solution. Each of the 12 demonstrators was equipped with a Sennheiser radio microphone and headset monitoring system on a different channel. Back at the central rack, the receivers and transmitters were connected to an audio matrix. From the matrix, any desired demonstrator’s microphone could be sent back via cable to any selected student bench. At the bench, a Williams Sound transmitter operating in the 2.4GHz band provided signals to eight pre-tuned receivers and headsets for the students. But what about if a student wanted to talk back?

A wireless microphone per student was out of the question — there weren’t enough clear channels and anyway, how could you control and direct all the traffic from 220 student transmitters? Leveraging Crestron’s control capabilities once more, Hardy came up with a traffic-light style solution.
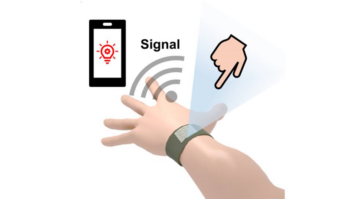
A bollard was built into the bench between each pair of students. At the top is a signal light tied back to the control system. When the instructor starts a session, this light illuminates in blue to signal the students to put on their headsets and listen in. If someone needs to ask a question, they press a button on the bollard, which turns their bollard ‘traffic light’ orange and brings up up an indicator on their instructor’s control panel. When the lecturer is ready to take the question, they touch the indicator on their screen, which activates the microphone mounted on that student’s bollard.
This allows lecturers to easily see when there is a question and avoid the cacophony that might ensue if a number of students tried to talk back at once. There’s also a ‘panic button’ on each bollard that turns the light red if someone needs immediate assistance. “The bollard lighting is C-Bus so interface integration was required for Crestron control,” explains Hardy.
Control system demands
By this stage, a lot was being asked of the control system. It needed to switch video; direct IP streams; route two-way audio; control and respond to traffic lights – all from up to 12 locations at once. Fortunately Crestron and the UTS programmer had been developing the control strategy alongside the hardware design on the proof-of-concept system.
To display the graphical user interface, the designers chose to use the Crestron X-Panel – a virtual touchpanel that appears directly on instructors’ PC screens. This gave plenty of screen space (up to 24in) for the interface when needed, and freed up precious bench real estate by using one screen instead of two.
The key element would be devising an intuitive way for each instructor to select the correct benches to include in their own group. Hardy explains how the final design works: “There’s an icon on the desktop when they start. The icon opens a full-screen plan of the SuperLab so they can see where all the benches are. They just select, by physically touching, each bench that they want to be a part of their group, then they press Begin Session to start the session. As all audio is via headphones, any group’s tables are not required to be together geographically. On the next screen that comes up, they can drag and drop any source to either the wall monitors or the student PC screens. Once that is happening they can minimise the X-Panel window or take it down in size and they’ve got access to the rest of the computer and the network if they wish.”
How has the installation been received? Hardy concludes: “The Superlab has been a huge success for the university, faculty and students. Student attendance and results have all been up, as well as retention rates, which was unexpected. Additionally the fact that students are working alongside others in different year groups and also different subjects seems to have spurred students into looking at extending or taking on additional studies.”
Pictures: Andrew Worrsam
www.bssaudio.com
www.crestron.eu
www.hp.com
www.matrox.com
www.nec-display-solutions.com
www.samsung.com
www.sennheiser.com
https://home.smarttech.com
www.uts.edu.au
www.williamssound.com
www.wolfvision.com